Hello everyone!
We are often asked about the possibility of using TiTAN in agriculture.
Today we will show one of the options for using TiTAN as a greenhouse management system.
We will be able to control the ventilation of the greenhouse depending on the humidity and temperature of the air, to water according to a schedule or reduction soil moisture and calculate how much water we have spent. The system will be powered by a small battery and replenished its charge with a solar battery.
First, we will make a soil moisture sensor.
To do this, we will need:
– capacitive soil moisture sensor;
-TiTAN-I board;
– PCB antenna at 433MHz;
– 2 AAA batteries;
-3D-printed case
The soil moisture sensor is designed to work from 5V. We will make a small modification and it will be able to work on batteries. To do this, replace the stabilizer with a jumper.
Let’s collect everything in the case and that’s what we’ve got.
From our page https://titan-project.com/software/ download the archive ” TiTAN-GREENHOUSE.zip” and upload the project “TiTAN_CSMS” to TiTAN. The program demonstrates the use of a power management mechanism and sleep mode. Waking up every 5 seconds, the soil moisture is measured and the results are transmitted by the radio. Such a power supply system will allow the sensor to work from 5 to 7 months. If you reduce the frequency of measurements, the sensor will be able to work for up to one year on one set of batteries.
Let’s put the sensor in the greenhouse.
Next, we will assemble a controller that will be located in the greenhouse and receive data from the sensor, measure the temperature and humidity of the air, control the motors and fans on the windows, open the water supply valve for watering and count the water flow.
To do this, we will need:
-TiTAN-I board;
– DHT22 or AM2302 temperature and humidity sensor;
– 5 miniature relays;
– electronics skills for assembling a 3.3 V pulse stabilizer, relay control keys.
Here’s what we’ve got.
Let’s upload the project “TiTAN-CSMS2” to TiTAN-I. You can find the port assignment in the project settings.
The controller will be powered by a special solar battery control device. We will place them and the battery inside the greenhouse.
Do not forget about the antenna.
We will place a solar panel on the roof and connect it.
Now you need to install the window opening/closing motors and fans.
It will look like this.
Install a watering system.
Water supply valve and water flow sensor.
Lay a hose with micro-irrigation on the beds of the greenhouse.
After that, connect everything and start assembling the control panel.
To do this, we will need:
-TiTAN-I board;
– Nextion 2.8 ” smart display
-3D-printed case.
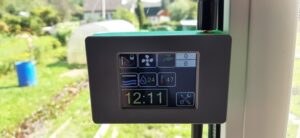
Let’s upload the project “TiTAN-CSMS3” to TiTAN-I, and the project “GREENHOUSE.HMI” to the Nextion display.
Here’s what we’ve got.
We can see that the data from the greenhouse is already being received by radio.
The air temperature in the greenhouse is 47 0 C, the humidity in the greenhouse is 24%, and the soil humidity is quite low. The windows are closed, the fans are turned off, the watering system is not turned on, the water consumption is zero.
The automatic control settings are quite diverse, and we will give only some pictures of the menu. (only for the text version)
You can easily adjust the air temperature you need at which the ventilation will begin, and control the soil moisture you need, as well as adjust the time of automatic opening/closing windows and watering.


